Ever tried making a smartphone stand from cardboard? Well, last weekend I did just that and came up with this DIY cardboard stand. If you are looking for ideas for a smartphone stand for taking photos or videos, this might the one for you. Before starting, credit and thanks to
Lorenz Holder for the original idea. Mine is a modified version with some changes here and there.
- Download the templates in PDF file format. Side A. Side B. Supports.
- Prepare materials and tools.
- a) Card stock paper ( 775gsm/1.2mm thick ), or thicker(1.2mm) cardboard boxes. It's better to use card stock paper because it is easier to work with. b) Blade cutter, scissors, glue, some A4 papers and a printer.
- Open the PDF files in Adobe Reader or any compatible software.
- Print two copies of the 'supports'. Print one each of Side A and B, print two copies if you need a sturdier stand.
- Paste the printed A4 papers onto the card stock paper( or cardboard) with glue. You can trim the A4 paper before pasting them. Then let the glue to dry.
- Cutout the supports and Side A/B parts.
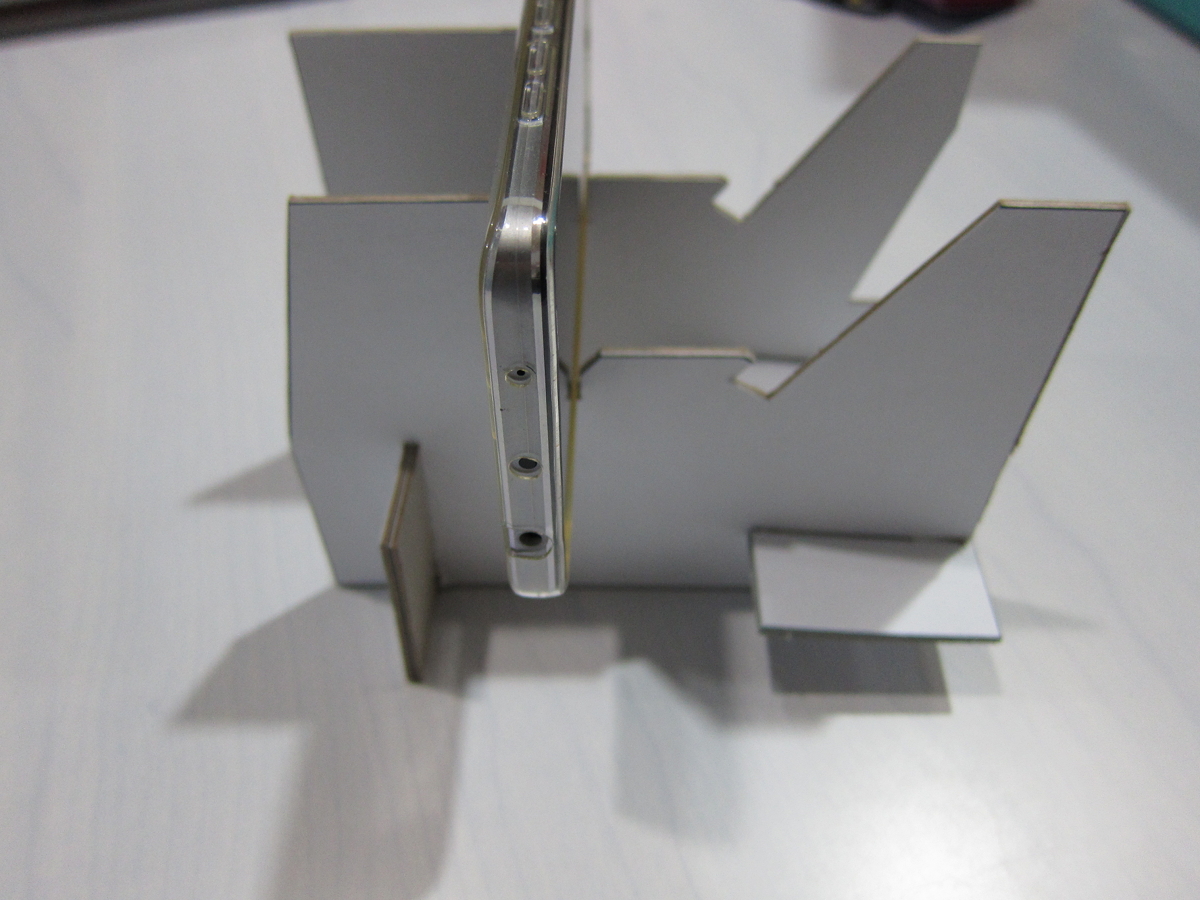
- Insert 'supports' parts into Side A/B slots. You can easily see how it's done from the photos provided below.
Goodluck with the DIY and feel free to ask me any questions by clicking the comment link below this post.
Cutouts ready to be assembled.
Two 'support' pieces together and slot in.